Home Coffee Roaster User Guides
Fresh Roast SR 700
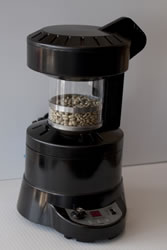
Here are the basic steps:
- Start with four level scoops of green coffee (scoop included).
- Remove the chaff collector, add the coffee to the roasting chamber and put the chaff collector back on.
- Connect the USB if going to use your computer – run the software to bring up the control panel – either set up the profile before hand (or load an existing one) or run it live and save what you have done.
- Set the timer for 6-10 minutes. We like to start the roast with a low/medium temperature setting and the highest fan speed for the first two minutes than set the temperature to high.
- As the coffee starts turning over vigorously, turn the fan speed down to build heat and keep the beans from chipping.
- If you want to stop the roast at any time, just hit the cool button. Don’t turn it to off, as the roaster is quite hot and needs the three minutes of cooling before being handled.
- If you see smoke coming from the roaster, you are getting to a dark roast and will want to think about hitting the cool button.
- After the timer shuts off, remove the chaff collector, (be careful – as the roaster is still pretty warm) lift out the roast chamber by its handle, and dump the beans.
I like to store the freshly roasted beans in an open container for 2 to 3 days, then move them to a sealed container. The only cleaning necessary is to dump out the chaff from the chaff collector and wipe the collector out, I use a small basting brush to clean. This model yields about 28 cups per batch. For more tips on Home Coffee Roasting see:
- Our general guide to Home Coffee Roasting
- Our Video Post on using the FreshRoast 500 Home Coffee Roaster. Many tips apply to the SR700
Go to the FreshRoast SR 700 product page for information on pricing and current deals.